The next step in binding your quilt is sewing the binding on.
(If you haven't made your binding yet, check out quilt binding part one
here.)
Leave about 5-10 inches of binding loose, and then start pinning the binding down to the top of your quilt with raw edges out. That means the fold of the quilt binding should be towards the center, and the two unfinished edges of the binding will be right on top of the edge of your quilt.
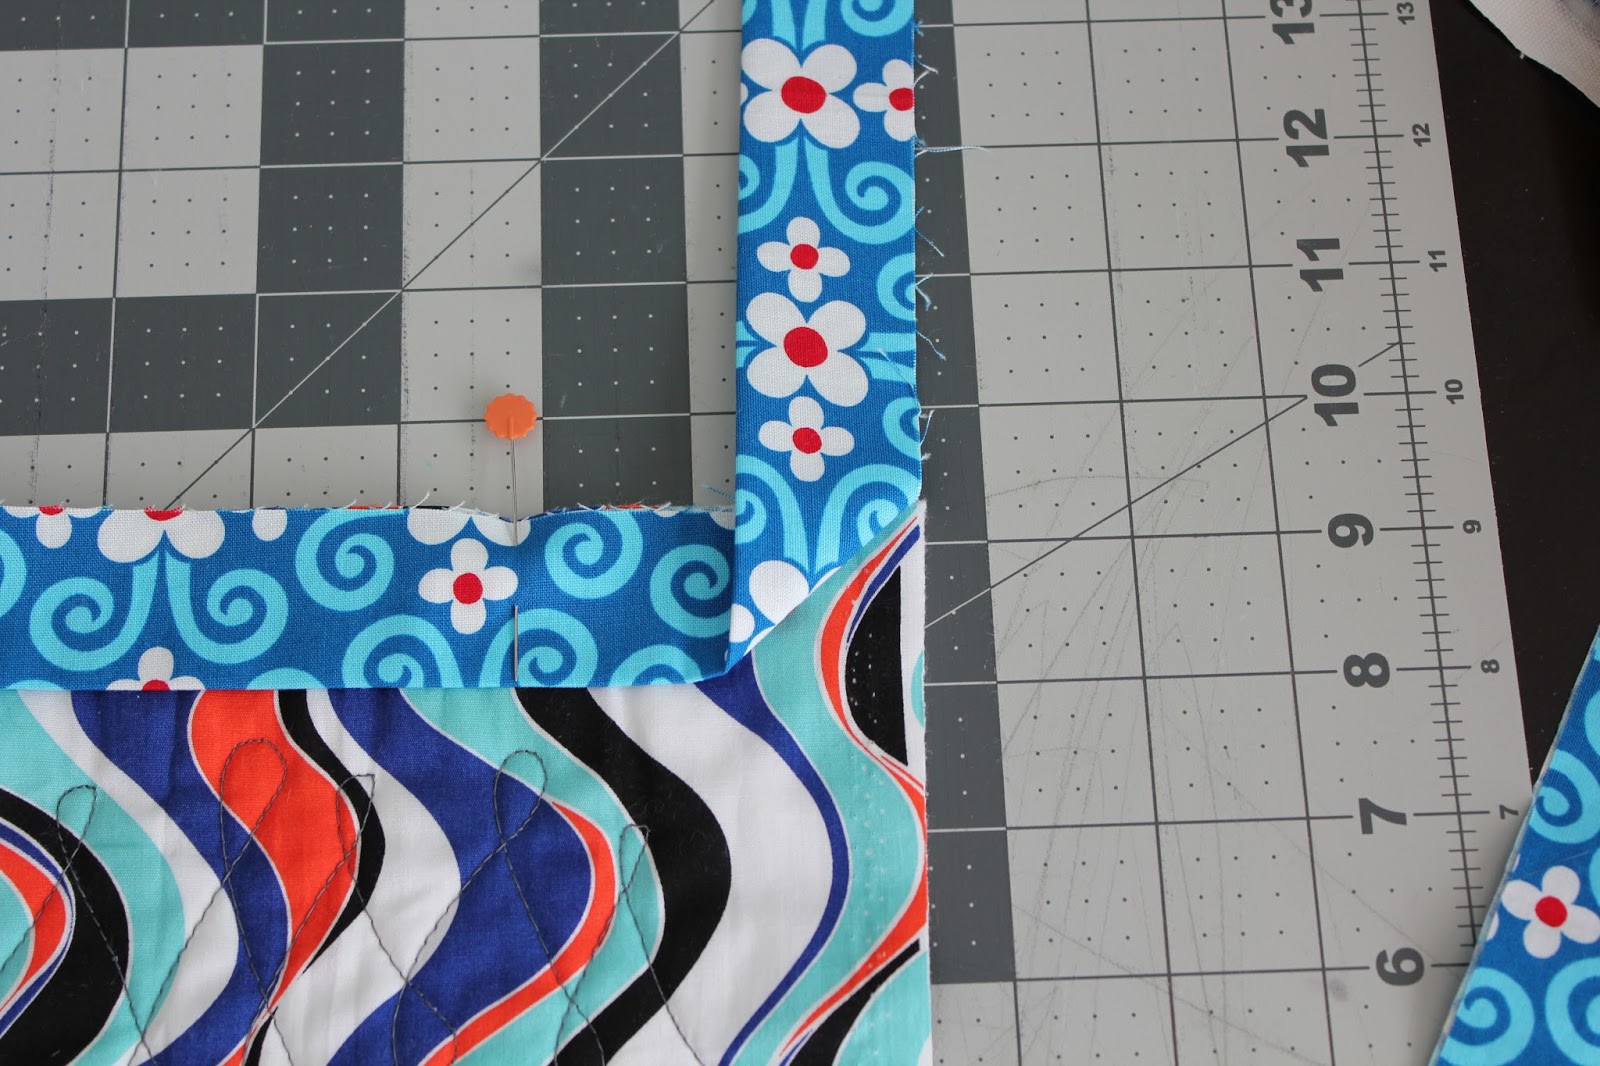
When you get to a corner,
Make a diagonal fold and lift the binding strip up,
Then fold it straight down and pin.
Keep going around your entire quilt until you reach 10" from where you started. Stop there and insert your last pin. You should have something that looks like this.
Using your walking foot, sew the binding to your quilt starting from your first pin.
Make sure you are using a quarter inch seam. My walking foot has a mark that indicates where the 1/4" seam line is. Maybe yours does too! If not, figure out where that quarter inch is, and stick to it.
After sewing for 3 or 4 inches, look back and check your seam allowance!
What about corners? When you approach a corner, pull up the pin that was holding the binding down and make a mental note of the diagonal crease line that was there. Pick up the flap...
And continue to sew a straight line right up to that diagonal crease line.
backstitch
Remove your quilt and break the threads.
This is what your quilt corner should look like now.
Flip that little triangle of fabric back over to the other side
and start sewing a straight line from the very top.
Continue going all the way around your quilt until you get to the last pin. Remember, this should be about 10 inches away from where you started.
Backstitch, remove the quilt, and cut your threads.
Now we need to connect the beginning and end of the binding together.
Take it to your ironing board and figure out where they should connect by flattening the binding strips down and having them meet in the middle.
Press it with your iron.
Open up your binding and look at the pressed lines.
Do your best to match up the pressed lines, right sides together. I pinned the fabric, and marked it so I could see it more easily.
It looks kind of crazy right now, but that's okay!
Take it to your machine and sew on the line. Double check that the fabric is right sides together!
After I sew the strip together, I like to hold it down on my quilt and make sure that it seems to fit properly before cutting the fabric. Make sure it will lie flat.
Go ahead and cut the extra fabric off by trimming 1/4" from the seam.
Press it open.
And press it in half.
Now you're all connected!
Take it to your machine and sew the gap down to the quilt. Overlap your stitches to make sure the binding strip is securely sewn on to the quilt.
It's all sewn down! You're 2/3 of the way there!
Take a break and eat some of your kids' halloween candy :)
To finish up your quilting binding by hand, click
here.